
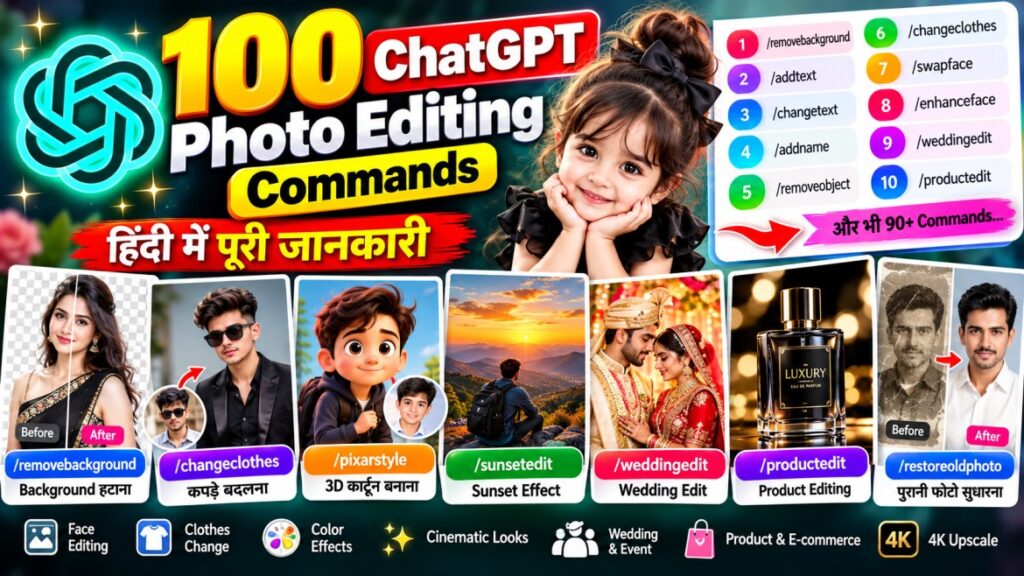
100 ChatGPT Photo Editing Short Codes की इस complete guide में आपको AI photo editing के लिए 100 powerful commands मिलेंगे। /removebackground, /changeclothes, /swapface, /pixarstyle, /weddingedit, /productedit, /youtubethumbnail, /restoreoldphoto, /luxurylook और ऐसे ही कई useful short codes को easy Hindi + English में explain किया गया है।
इन commands की मदद से आप background remove, face enhancement, clothes change, cinematic effects, wedding edits, product photos, social media images, old photo restoration और creative AI editing आसानी से सीख सकते हैं। Beginners और content creators के लिए यह एक useful AI Photo Editing Cheat Sheet है। AI Bundle
1. /removebackground — फोटो का Background हटाना
यह command किसी फोटो के पीछे मौजूद background को हटाने के लिए इस्तेमाल किया जाता है। इसके बाद आप transparent background, white background, studio background, outdoor location या अपनी पसंद का कोई नया background लगा सकते हैं। इस command में मुख्य व्यक्ति या object को original रखते हुए उसके edges को साफ और natural रखना जरूरी है।
2. /addtext — फोटो में Text जोड़ना
इस command की मदद से फोटो के ऊपर कोई भी text जोड़ा जा सकता है। जैसे नाम, quote, offer, price, product information, birthday message, wedding text या promotional headline। Text की font, size, color, position और style को image के design के अनुसार रखा जा सकता है।
3. /changetext — फोटो में मौजूद Text बदलना
इस command का उपयोग image में पहले से लिखे हुए text को दूसरे text से replace करने के लिए किया जाता है। कोशिश यह रहती है कि नया text उसी position, font style, size और color में दिखाई दे, ताकि edited image original design जैसी ही लगे।
4. /addname — फोटो में नाम जोड़ना
इस command से किसी व्यक्ति या product image पर नाम जोड़ा जा सकता है। Birthday photo, certificate, invitation, wedding design, social-media poster और personalized graphics में यह काफी उपयोगी है। नाम को image के overall design के अनुसार attractive तरीके से place किया जा सकता है।
5. /removeobject — फोटो से Unwanted Object हटाना
इस command का इस्तेमाल फोटो में मौजूद unwanted वस्तु को हटाने के लिए किया जाता है। जैसे कोई bag, chair, pole, vehicle, unwanted item या background में दिखाई दे रही कोई चीज। Object हटाने के बाद खाली जगह को आसपास के background से naturally fill किया जा सकता है।
6. /changeclothes — कपड़े बदलना
यह command व्यक्ति के कपड़ों को digitally बदलने के लिए उपयोगी है। आप casual dress को formal suit, traditional outfit, saree, wedding dress या किसी दूसरे fashion outfit में बदलने का निर्देश दे सकते हैं। बेहतर result के लिए face, hairstyle, body shape और pose को unchanged रखने की instruction दी जा सकती है।
7. /ageprogress — उम्र बढ़ाकर दिखाना
इस command से व्यक्ति का realistic aged appearance बनाया जा सकता है। चेहरे पर natural wrinkles, mature facial structure, hair changes और उम्र के अनुरूप subtle details जोड़ी जा सकती हैं। उद्देश्य व्यक्ति की पहचान और facial features को बनाए रखते हुए उम्र का visual progression दिखाना होता है।
8. /ageback — उम्र कम करके दिखाना
यह command किसी व्यक्ति को comparatively younger appearance देने के लिए इस्तेमाल की जाती है। Face structure और identity को बनाए रखते हुए skin texture, facial lines और अन्य age-related details को कम किया जा सकता है।
9. /swapface — Face Swap करना
इस command का उपयोग एक फोटो के चेहरे को दूसरे reference face से बदलने के लिए किया जाता है। अच्छे परिणाम के लिए face angle, lighting, skin tone और facial proportions को scene के अनुसार match करना आवश्यक होता है। इसका उपयोग केवल अपनी या अधिकृत images के साथ करना चाहिए।
10. /addpeople — फोटो में नए लोग जोड़ना
इस command से existing photo में नए व्यक्ति या व्यक्तियों को digitally add किया जा सकता है। AI को नए व्यक्ति की position, pose, size, lighting और perspective को original scene के साथ match करने का निर्देश दिया जा सकता है, जिससे result natural दिखाई दे।
11. /removepeople — फोटो से लोगों को हटाना
इस command से background या foreground में मौजूद unwanted लोगों को हटाया जा सकता है। AI खाली हुई जगह को आसपास के environment से reconstruct कर सकता है, ताकि ऐसा लगे कि वहां कोई व्यक्ति मौजूद ही नहीं था।
12. /changehairstyle — Hairstyle बदलना
इस command की मदद से व्यक्ति के hairstyle को बदला जा सकता है। Short hair, long hair, curly hair, fade haircut, bun, layered haircut या किसी specific hairstyle का निर्देश दिया जा सकता है। Face और identity को unchanged रखने की instruction देने से result अधिक consistent रहता है।
13. /haircolor — बालों का Color बदलना
इस command से बालों का color digitally बदला जा सकता है। Black, brown, blonde, red, burgundy, blue या किसी custom shade का उपयोग किया जा सकता है। Hair strands और natural highlights को बनाए रखने पर result अधिक realistic दिखाई देता है।
14. /makeitanime — फोटो को Anime Style में बदलना
यह command real photograph को anime-inspired artwork में बदलने के लिए इस्तेमाल की जाती है। इसमें facial features, eyes, colors और overall rendering को animated appearance दिया जा सकता है। Background को भी उसी artistic style के अनुसार transform किया जा सकता है।
15. /makeitcartoon — फोटो को Cartoon बनाना
इस command से real photo को cartoon illustration में बदला जा सकता है। इसमें चेहरे और वस्तुओं की पहचान को बनाए रखते हुए simplified shapes, vibrant colors और illustrated appearance दिया जा सकता है।
16. /makeit3d — फोटो को 3D Look देना
इस command का उपयोग image को three-dimensional rendered appearance देने के लिए किया जाता है। Lighting, shadows, depth, textures और object edges को इस तरह enhance किया जा सकता है कि image 3D artwork जैसी दिखाई दे।
17. /toyportrait — Toy Portrait बनाना
इस command से व्यक्ति या character को collectible toy या miniature figurine जैसा appearance दिया जा सकता है। Plastic/vinyl texture, studio lighting, toy-like proportions और product photography setup जोड़कर attractive result बनाया जा सकता है।
18. /actionfigure — Action Figure बनाना
यह command किसी व्यक्ति या character को realistic action figure के रूप में प्रस्तुत करने के लिए उपयोग की जाती है। इसमें toy body, detailed costume, accessories, packaging और professional product photography जैसा presentation बनाया जा सकता है।
19. /pixarstyle — 3D Animated Movie Style
यह command फोटो को high-quality 3D animated movie जैसी visual appearance देने के लिए उपयोग की जाती है। इसमें expressive facial features, polished 3D materials, soft cinematic lighting और colorful environment बनाया जा सकता है।
20. /ghibliart — Ghibli-Inspired Art Style
यह command फोटो को soft, dreamy और hand-painted animation aesthetic में transform करने के लिए उपयोग की जाती है। इसमें warm colors, painterly textures, atmospheric background और whimsical visual feeling दी जा सकती है।
21. /sketch — Sketch Effect बनाना
इस command से किसी photograph को hand-drawn sketch जैसा बनाया जा सकता है। Pencil outlines, shading और paper texture का उपयोग करके ऐसा effect बनाया जाता है जैसे image को कलाकार ने हाथ से draw किया हो।
22. /pencilrawing — Pencil Drawing बनाना
यह command photo को detailed graphite pencil drawing में बदलने के लिए उपयोगी है। Fine pencil lines, realistic shading, cross-hatching और paper texture जोड़कर traditional pencil artwork जैसा परिणाम बनाया जा सकता है।
23. /watercolor — Watercolor Painting बनाना
इस command से photograph को watercolor painting में बदल सकते हैं। इसमें soft color blending, transparent paint layers, brush textures और paper grain का उपयोग करके traditional watercolor artwork जैसा look बनाया जाता है।
अगर आप भी AI Video बनाना या सीखना चाहते हो, तो मैंने आपके लिए एक Ebook Pdf Step by Step AI Video के बारे में बताया है, जो लोग इस Ebook को खरीदना चाहते है, तो इस लिंक पर क्लिक करे Buy Now
24. /oilpainting — Oil Painting Effect
यह command photo को traditional oil painting की तरह transform करती है। इसमें visible brush strokes, rich colors, textured surface और artistic lighting शामिल की जा सकती है।
25. /vectorart — Vector Art बनाना
इस command से photograph को clean digital vector illustration में बदलने का प्रयास किया जाता है। इसमें sharp outlines, simplified shapes और smooth color areas का उपयोग किया जाता है, जो logos, posters और digital graphics के लिए उपयोगी हो सकता है।
100 ChatGPT Photo Editing Short Codes Creative & Color Editing
26. /doubleexposure — Double Exposure Effect
इस command से दो अलग-अलग images या visual elements को artistic तरीके से एक composition में combine किया जाता है। उदाहरण के लिए व्यक्ति के silhouette के अंदर mountains, city या forest दिखाया जा सकता है।
27. /silhouette — Silhouette Effect
इस command में व्यक्ति या object को dark silhouette के रूप में दिखाया जाता है और पीछे dramatic background रखा जाता है। Sunset, sunrise और cinematic poster designs में यह effect विशेष रूप से आकर्षक हो सकता है।
28. /skyreplacement — आसमान बदलना
इस command से original sky को किसी दूसरे sky से replace किया जा सकता है। Clear blue sky, cloudy sky, sunset, dramatic clouds या fantasy sky लगाया जा सकता है, जबकि foreground को natural रखने की कोशिश की जाती है।
29. /sunsetedit — Sunset Photography Edit
इस command का उपयोग image में beautiful sunset atmosphere बनाने के लिए किया जाता है। Warm orange और golden lighting, long shadows और evening ambience जोड़कर photo को sunset photography जैसा बनाया जा सकता है।
30. /sunriseedit — Sunrise Photography Edit
इस command से image में सुबह का sunrise atmosphere बनाया जाता है। Soft golden sunlight, warm horizon और subtle morning lighting का उपयोग करके fresh sunrise appearance तैयार किया जा सकता है।
31. /bluehour — Blue Hour Effect
Blue Hour sunset के तुरंत बाद या sunrise से पहले का वह समय है जब वातावरण में deep blue tones दिखाई देते हैं। इस command से photo को cool blue cinematic atmosphere और soft ambient lighting दी जा सकती है।
32. /goldenhour — Golden Hour Effect
इस command से photo में warm और soft golden sunlight जोड़ी जाती है। चेहरे, buildings और landscapes पर golden highlights और natural shadows देकर professional outdoor photography जैसा result बनाया जा सकता है।
33. /nightmode — Day Photo को Night Look देना
यह command daytime image को nighttime environment जैसा दिखाने के लिए उपयोग की जाती है। Darker sky, artificial lights, cool shadows और night ambience जोड़कर scene को रात का appearance दिया जा सकता है।
34. /moodtone — Photo का Mood बदलना
इस command से image के overall colors, contrast और lighting को किसी particular mood के अनुसार बदला जा सकता है। उदाहरण के लिए romantic, dark, happy, mysterious, warm या calm mood बनाया जा सकता है।
35. /cinematicgrade — Cinematic Color Grading
यह command photograph को movie-like cinematic color treatment देने के लिए उपयोग की जाती है। Contrast, highlights, shadows, skin tones और overall color palette को cinematic appearance के अनुसार adjust किया जा सकता है।
36. /tealorange — Teal & Orange Cinematic Look
इस command में shadows और background में teal/cyan tones तथा skin और highlights में warm orange tones का उपयोग किया जाता है। इससे image को popular cinematic color-grade जैसा appearance मिल सकता है।
37. /blackandwhite — Black & White Photo
यह command color image को monochrome black-and-white photograph में बदलती है। Contrast और lighting को adjust करके classic portrait, documentary या dramatic photography जैसा effect बनाया जा सकता है।
38. /colorpop — Color Pop Effect
इस command से किसी खास object या color को vibrant रखा जा सकता है जबकि बाकी image के colors को subdued या monochrome किया जा सकता है। इससे मुख्य subject तुरंत ध्यान आकर्षित करता है।
39. /duotone — Two-Color Artistic Effect
इस command में पूरी image को मुख्य रूप से दो colors की color scheme में transform किया जाता है। यह posters, album artwork, social media graphics और modern advertising designs में उपयोगी हो सकता है।
40. /vintagefilm — Vintage Film Look
इस command से image को पुराने analog film camera से खींची गई photograph जैसा बनाया जाता है। Warm tones, faded colors, subtle grain और nostalgic atmosphere इसमें शामिल हो सकते हैं।
41. /filmgrain — Film Grain जोड़ना
यह command image में subtle photographic grain texture जोड़ती है। इसका उद्देश्य digital image को analog film photography जैसा organic texture देना होता है।
42. /polaroidstyle — Polaroid Photo Style
इस command से image को classic instant-camera/Polaroid photograph जैसा presentation दिया जा सकता है। White frame, soft colors और nostalgic photography aesthetic शामिल की जा सकती है।
43. /retrostyle — Retro Style
यह command photo में पुराने समय की visual aesthetic लागू करने के लिए उपयोग की जाती है। Vintage colors, typography, grain, faded texture और पुराने photography characteristics शामिल किए जा सकते हैं।
44. /vhlook — VHS Look
यह command photo या visual को पुराने VHS/camcorder footage जैसा appearance देने के लिए उपयोग की जाती है। Grain, scan-line जैसी visual characteristics, color shifts और analog distortion का इस्तेमाल किया जा सकता है।
45. /oldphoto — Old Photo Effect
इस command से modern photograph को पुरानी तस्वीर जैसा बनाया जा सकता है। Faded colors, sepia tones, scratches, grain और aged-paper texture जोड़कर vintage appearance बनाया जा सकता है।
46. /newspapereffect — Newspaper Effect
इस command से image को newspaper में printed photograph जैसा बनाया जा सकता है। Monochrome tones, print texture, halftone dots और paper appearance इस्तेमाल किए जा सकते हैं।
47. /hdrlook — HDR Look
यह command photo में details और tonal range को अधिक pronounced बनाने के लिए उपयोग की जाती है। Highlights और shadows के बीच detail को balance करके landscape और architecture photos में dramatic appearance बनाया जा सकता है।
48. /mattefinish — Matte Finish
इस command से image को soft premium matte photography look दिया जाता है। Highlights को subdued और colors को refined रखा जाता है, जिससे photograph sophisticated और professional दिखाई दे सकती है।
49. /softfocus — Soft Focus Effect
इस command से image में subtle softness और dreamy glow जोड़ा जाता है। Portrait और romantic photography में यह effect subject को gentle और elegant appearance दे सकता है।
50. /sharpenimage — Image को Sharpen करना
यह command photo की visible details और edges को अधिक स्पष्ट बनाने के लिए इस्तेमाल की जाती है। Slightly soft image में texture और clarity improve की जा सकती है, हालांकि बहुत ज्यादा sharpening से unnatural edges बन सकते हैं।
ChatGPT Photo Editing Commands: 100 AI Short Codes
Face & Portrait Editing
51. /enhanceface — Face Enhancement
इस command से चेहरे की overall clarity, lighting और visible details को improve किया जा सकता है। इसका उद्देश्य facial appearance को साफ और polished बनाना है, जबकि व्यक्ति की मूल पहचान और facial structure को preserve किया जाए।
52. /smoothskin — Skin Smooth करना
इस command से skin की uneven texture और छोटे imperfections को soft किया जा सकता है। Natural pores और facial details को पूरी तरह हटाने के बजाय subtle retouching करने पर result ज्यादा realistic रहता है।
53. /removeblemishes — Skin Blemishes हटाना
इस command का उपयोग temporary pimples, small spots और minor skin imperfections को remove करने के लिए किया जाता है। इसका उद्देश्य face को clean बनाना है, लेकिन natural skin texture को बनाए रखना बेहतर होता है।
54. /whiteteeth — Teeth Whitening
इस command से teeth को naturally brighter और cleaner appearance दिया जा सकता है। बहुत ज्यादा white करने के बजाय subtle whitening रखने से smile अधिक realistic दिखाई देती है।
55. /brighteyes — Eyes को Bright करना
इस command से आंखों की clarity और brightness को subtly enhance किया जा सकता है। Eye whites, iris details और catchlights को improve करके portrait को अधिक lively appearance दिया जा सकता है।
56. /makeupedit — Makeup Edit
इस command से photograph में digital makeup enhancement किया जा सकता है। Lip color, eyeliner, blush, eyeshadow और foundation जैसी चीजों को desired style के अनुसार adjust किया जा सकता है।
57. /naturalglow — Natural Skin Glow
इस command का उद्देश्य चेहरे और skin पर subtle healthy glow देना है। Soft highlights और warm lighting का उपयोग करके skin को radiant बनाया जा सकता है, लेकिन अत्यधिक चमक से बचना चाहिए।
58. /portraitlight — Professional Portrait Lighting
इस command से साधारण portrait को professional studio lighting जैसा appearance दिया जा सकता है। Face पर controlled highlights, shadows और soft light direction बनाई जा सकती है।
59. /studioeffect — Studio Photography Effect
इस command से ordinary photo को professional studio portrait जैसा बनाया जा सकता है। Clean background, controlled lighting, soft shadows और polished photographic quality इसमें शामिल की जा सकती है।
60. /bokeheffect — Bokeh Background Effect
इस command से background को blur करके छोटे circular light highlights यानी bokeh बनाया जाता है। इससे subject foreground में ज्यादा prominent दिखाई देता है और image DSLR photography जैसी लग सकती है।
61. /depthoffield — Depth of Field Effect
इस command से foreground subject को sharp रखते हुए background को softly blur किया जाता है। इससे image में photographic depth आती है और subject पर viewer का ध्यान केंद्रित होता है।
62. /lensflare — Lens Flare Effect
इस command से camera lens में तेज रोशनी आने पर दिखाई देने वाला flare effect create किया जा सकता है। Sunset, cinematic portraits और dramatic scenes में इसका creative उपयोग किया जा सकता है।
63. /lightleak — Light Leak Effect
इस command से photo में artistic light leakage जोड़ी जाती है। किनारों से आती हुई warm, orange, red या अन्य colored light image को vintage और creative appearance दे सकती है।
64. /dramaticlighting — Dramatic Lighting
इस command से image में strong directional light, deep shadows और bright highlights create किए जाते हैं। इसका उपयोग cinematic portraits, fashion photography और dramatic posters में किया जा सकता है।
65. /coloredlights — Colored Studio Lights
इस command से photo में colored lighting जैसे blue, red, purple, pink या green lights add की जा सकती हैं। इससे portrait को modern studio या cinematic appearance मिलता है।
66. /festivaledit — Festival Theme Edit
इस command से किसी photo को festival celebration के अनुसार transform किया जा सकता है। Decorative lights, flowers, colors, festive background और celebration elements जोड़े जा सकते हैं।
67. /birthdayedit — Birthday Photo Edit
इस command का उपयोग birthday-themed photograph बनाने के लिए किया जाता है। Balloons, birthday cake, confetti, decorative lights और birthday text जैसी चीजें जोड़ी जा सकती हैं।
68. /weddingedit — Wedding Photo Edit
इस command से साधारण couple या portrait photo को wedding photography जैसा look दिया जा सकता है। Wedding venue, flowers, decorative lights, traditional elements और romantic cinematic lighting जोड़ी जा सकती है।
69. /anniversaryedit — Anniversary Photo Edit
इस command से anniversary celebration के लिए romantic photo तैयार की जा सकती है। Flowers, candles, elegant decorations, anniversary text और warm lighting का उपयोग किया जा सकता है।
70. /babyphotoshoot — Baby Photoshoot Effect
इस command से baby की साधारण photo को professional photoshoot setup जैसा बनाया जा सकता है। Soft lighting, cute props, themed background और gentle colors का उपयोग किया जा सकता है।
71. /maternityedit — Maternity Photo Edit
इस command से maternity photography को professional और elegant appearance दिया जा सकता है। Background, lighting, outfit presentation और overall composition को sophisticated बनाया जा सकता है।
72. /familyportrait — Family Portrait
इस command का उपयोग family members की photos को एक coordinated family portrait में प्रस्तुत करने के लिए किया जा सकता है। Composition, lighting और background को consistent बनाने पर natural group portrait तैयार किया जा सकता है।
73. /coupleportrait — Couple Portrait
यह command couple की photograph को professional romantic portrait में बदलने के लिए उपयोगी है। Lighting, background, pose presentation और color grading को coordinated रखा जा सकता है।
74. /petportrait — Pet Portrait
इस command से dog, cat या किसी दूसरे pet की ordinary photo को professional portrait में बदला जा सकता है। Background blur, studio lighting, fur detail और cinematic composition का उपयोग किया जा सकता है।
75. /foodedit — Food Photography Edit
इस command से food की photograph को ज्यादा appetizing और professional बनाया जा सकता है। Colors, brightness, texture, shadows और background को इस तरह enhance किया जाता है कि food अधिक appealing दिखाई दे।
100 AI Photo Editing Commands in Hindi Product, Social Media & Business Editing
76. /productedit — Product Photo Editing
इस command से product image को professional commercial photograph में बदला जा सकता है। Clean background, proper lighting, realistic shadow, sharp details और accurate product colors पर ध्यान दिया जाता है।
77. /ecommerceedit — E-commerce Product Edit
यह command online marketplace के लिए product photos तैयार करने में उपयोगी है। Product को clean background, proper framing, balanced lighting और commercial presentation में दिखाया जा सकता है। Product का original design और important details preserve करना जरूरी है।
78. /removewatermark — Watermark हटाना
यह command किसी image से watermark हटाने के लिए इस्तेमाल की जाती है। इसका उपयोग केवल अपनी image या ऐसी image पर करना उचित है जिसके watermark को हटाने की आपको अनुमति हो।
79. /addwatermark — Watermark जोड़ना
इस command से अपनी photo या product image पर brand name, logo, website या copyright information जोड़ी जा सकती है। इससे online images पर brand identity और ownership information दिखाई जा सकती है।
80. /instagramedit — Instagram के लिए Photo Edit
यह command Instagram post, profile, carousel या social-media content के लिए photo को optimize करने के लिए इस्तेमाल की जा सकती है। Composition, colors, crop, brightness और text placement को Instagram-friendly बनाया जा सकता है।
81. /youtubethumbnail — YouTube Thumbnail बनाना
इस command से YouTube video के लिए attractive thumbnail तैयार किया जा सकता है। Subject को prominent रखना, readable headline, strong contrast और clear composition का उपयोग करना thumbnail को mobile screen पर आसानी से समझने योग्य बनाता है।
82. /linkedinprofile — LinkedIn Professional Profile Photo
यह command professional profile picture तैयार करने के लिए उपयोगी है। Clean background, balanced lighting, formal presentation और natural facial appearance पर ध्यान दिया जाता है ताकि photo professional profile के लिए suitable हो।
83. /passportphoto — Passport Size Photo
इस command से passport/application-style photograph तैयार की जा सकती है। इसमें appropriate framing, clean background, correct head positioning और आवश्यक dimensions के अनुसार cropping की जरूरत हो सकती है।
84. /idphoto — ID Photo बनाना
यह command identity card, application form या दूसरे official documents के लिए suitable photo तैयार करने में मदद कर सकती है। इसमें clean background, proper framing और face visibility को प्राथमिकता दी जाती है।
85. /resizeimage — Image का Size बदलना
इस command से image को किसी specific dimension या platform requirement के अनुसार resize किया जा सकता है। उदाहरण के लिए social-media post, website banner, product listing या profile picture के लिए अलग-अलग dimensions बनाए जा सकते हैं।
86. /cropimage — Image Crop करना
यह command image के unwanted हिस्सों को काटकर subject को सही framing में लाने के लिए उपयोगी है। Square, portrait, landscape या किसी specific aspect ratio के अनुसार crop किया जा सकता है।
87. /upscale4k — Image को 4K तक Upscale करना
यह command low-resolution image को higher-resolution appearance देने के लिए इस्तेमाल की जाती है। AI missing details को अनुमान के आधार पर reconstruct कर सकता है, इसलिए यह वास्तविक camera detail को हमेशा पूरी तरह recover नहीं कर सकता।
88. /restoreoldphoto — पुरानी Photo Restore करना
इस command से damaged या faded old photographs को restore करने का प्रयास किया जाता है। Scratches, stains, fading, tears और low contrast जैसी समस्याओं को repair या improve किया जा सकता है।
89. /removeblur — Photo का Blur कम करना
यह command blurry image को अधिक sharp और clear बनाने के लिए उपयोग की जाती है। AI कुछ खोई हुई details का अनुमान लगा सकता है, लेकिन बहुत ज्यादा blur होने पर original details को पूरी तरह वापस लाना संभव नहीं होता।
90. /motionblur — Motion Blur Effect
यह command image में movement का realistic visual effect create करती है। Moving car, running person, spinning object या fast action scene में directional blur जोड़कर motion का एहसास कराया जा सकता है।
91. /longexposure — Long Exposure Photography Effect
इस command से camera की long-exposure photography जैसी appearance बनाई जा सकती है। Traffic light trails, smooth water, moving clouds और light streaks जैसे effects create किए जा सकते हैं।
92. /addreflection — Reflection जोड़ना
इस command से product या object के नीचे realistic reflection create किया जा सकता है। खासकर product advertisements, perfume bottles, cosmetics और luxury products में reflective surface premium appearance दे सकती है।
93. /mirrorimage — Mirror Image बनाना
यह command image को horizontally या vertically mirror करने के लिए उपयोग की जाती है। इसका उपयोग creative compositions, symmetry designs और visual experiments में किया जा सकता है।
94. /createcollage — Photo Collage बनाना
इस command से कई photographs को एक single collage layout में combine किया जा सकता है। Wedding album, birthday memories, travel photos, family memories और product collections के लिए अलग-अलग layouts बनाए जा सकते हैं।
95. /splitimage — Image को कई हिस्सों में Split करना
इस command से एक बड़ी image को multiple panels या sections में divide किया जा सकता है। Instagram carousel, puzzle design, comparison layout या multi-post social-media content बनाने में इसका उपयोग किया जा सकता है।
96. /beforeafter — Before & After Comparison
यह command editing से पहले और editing के बाद की photos को एक ही design में compare करने के लिए उपयोगी है। Photo restoration, skin retouching, product editing और color grading का difference दिखाने के लिए यह विशेष रूप से उपयोगी है।
97. /addframe — Photo में Frame जोड़ना
इस command से photo के चारों तरफ decorative या minimal frame लगाया जा सकता है। Wedding, birthday, family portrait, certificate, product advertisement या premium photo presentation के लिए अलग-अलग frame styles इस्तेमाल किए जा सकते हैं।
98. /minimaledit — Minimal और Natural Editing
यह command photo में केवल जरूरी corrections करने के लिए है। इसका उद्देश्य image को पूरी तरह बदलना नहीं बल्कि brightness, color, sharpness, minor imperfections और composition जैसी चीजों को subtly improve करना है ताकि original natural appearance बनी रहे।
99. /luxurylook — Premium Luxury Look
इस command से photo को high-end luxury advertisement जैसा appearance दिया जा सकता है। Elegant lighting, sophisticated background, premium color grading, realistic shadows और polished composition का उपयोग करके expensive commercial aesthetic बनाया जा सकता है।
100. /creativeedit — Creative Photo Editing
यह सबसे flexible creative command है। इसमें ordinary photograph को imaginative और artistic concept में transform किया जा सकता है। अलग background, cinematic lighting, surreal elements, creative composition, special effects और unique visual storytelling को एक साथ combine किया जा सकता है।
Keywords:- ChatGPT photo editing commands, AI photo editing commands,
photo editing short codes, ChatGPT image editing commands, ChatGPT prompts for photo editing, photo editing prompts in Hindi, ChatGPT photo editing Hindi,
AI photo editing Hindi, ChatGPT short codes, background removal prompt,
face editing prompt, clothes change prompt, face swap prompt, hairstyle change prompt,